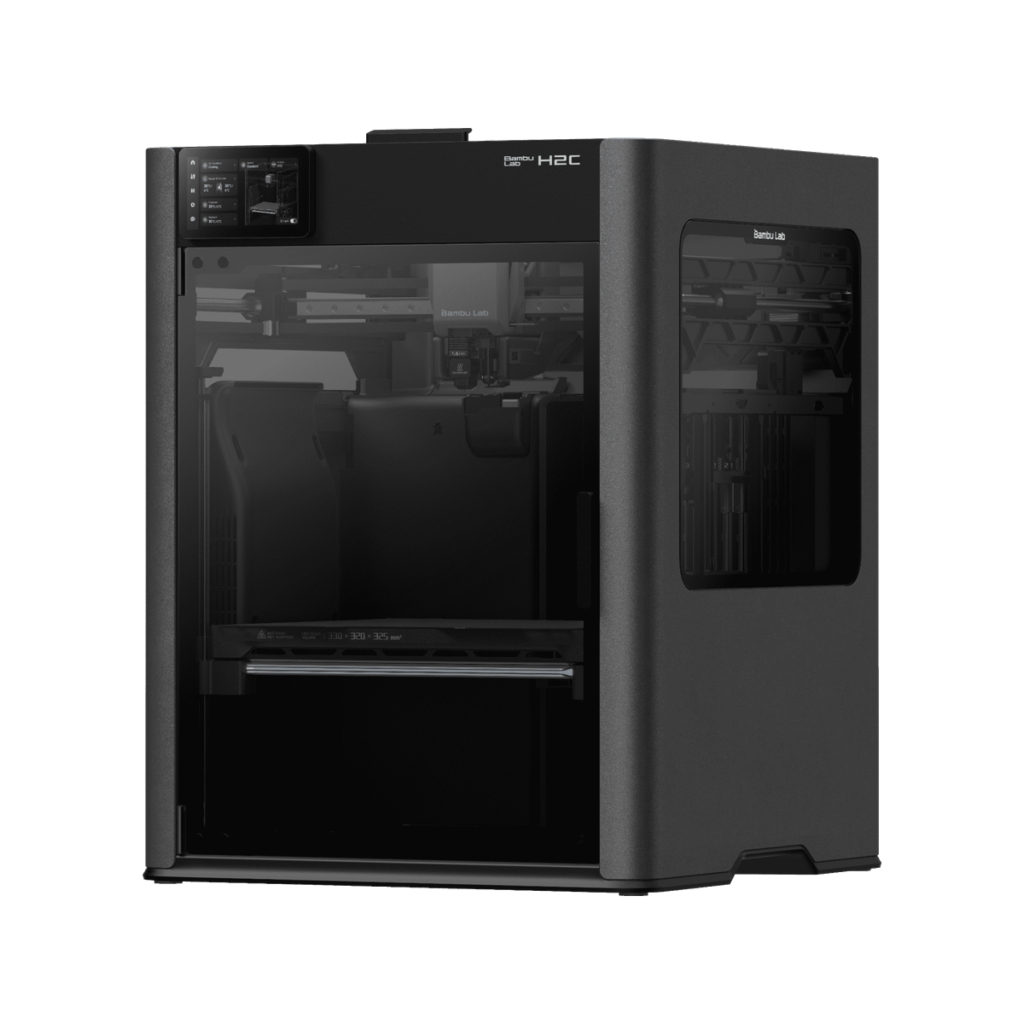
The H2C: Bambu’s Multi-Material Flagship
The H2C is the most expensive — and most ambitious — printer Bambu Lab has ever shipped. At its core is Vortek: a magnetic induction hotend exchange system that physically swaps entire nozzles mid-print instead of purging filament through a single nozzle. The result? Seven colors with zero poop waste. No purge tower of shame. No kilograms of discarded rainbow spaghetti.
This review is based on over 400 hours of real-world printing — Benchy, BenchBin, PPA-GF, ABS, ASA, PC, a 4-material drone frame, and a 7-color robot model with exact material-consumption measurements.
The H2C Combo bundles the printer with one AMS 2 Pro (4-slot sealed dry box). You can chain multiple AMS units for hybrid Vortek + AMS printing — up to 25 colors in extreme configurations.
H2 Series Lineup: Where the H2C Sits
| Model | Combo Price (USD) | Build Volume | Key Differentiator |
|---|---|---|---|
| H2C Combo | $2,199 | 330×320×325mm | Vortek 7-color zero-poop + 65°C chamber |
| H2D Combo | $1,749 | 350×320×325mm | Dual-nozzle + optional laser/cutter |
| H2S Combo | $1,399 | 325×320×325mm | Single-nozzle, highest value in H2 family |
Unboxing: What’s Inside
The shipping box is massive — gross weight 44.7 kg (98.5 lbs) for the AMS Combo. Two-person lift, no exceptions. Inside, the printer is pre-assembled and absurdly well-packed:
Contents Checklist
| Item | Details |
|---|---|
| H2C printer body | Pre-assembled, 32.5 kg, aluminum/steel chassis |
| AMS 2 Pro | Sealed 4-slot dry box, pre-installed inside the chamber |
| Induction hotends × 5 | Hardened steel, pre-loaded in Vortek rack (right side) |
| Glass top lid | Tempered, sits on top rails |
| Spool holder | External mount for single-color or TPU bypass |
| Tool kit | Installation/maintenance tools |
| Spare parts box | Replacement cutters, screws, PTFE tubing |
| Safety key | Must be inserted before power-on (rear panel) |
| PTFE tubing + cables | For AMS connections |
One striking first impression: the right side of the machine houses the Vortek hotend rack — 5 induction hotends sit in a magazine-like array, secured with zip ties and foam padding for shipping. The toolhead looks similar to the H2D’s, but the right-side nozzle uses an induction heating sleeve instead of a traditional heater cartridge. A reinforced cooling fan sits on top of the toolhead — necessary given the 350°C ceiling.
Assembly: Under an Hour from Box to Bench
No frame bolting. No belt tensioning. Four steps:
- Remove shipping restraints — cut the zip ties and peel the foam blocks from the Vortek rack area
- Install the glass top lid — drops onto the upper rails
- Insert the safety key — rear panel, peel-off tape reveals the slot
- Place AMS 2 Pro on top — connect PTFE tubes and data cables
Initialization Wizard (~1 hour total)
Once powered on, the touchscreen walks you through language, region, and WiFi setup — same Bambu onboarding flow as every other machine in the lineup. Then the real calibration begins:
| Step | Time | What It Does |
|---|---|---|
| Nozzle offset calibration | ~30 min combined | Measures offset between left (AMS) and right (induction) nozzles |
| Motor noise reduction | Tunes stepper frequencies to minimize resonance | |
| Vibration compensation | Input shaping calibration (X/Y axis) | |
| Auto bed leveling | Full mesh mapping of the PEI plate | |
| Vortek hotend rack setup | ~7 min 30 sec | Toolhead camera calibration + hotend load/unload cycle test; half the time is waiting for the bed to cool |
After calibration, three prompts appear: firmware update (recalibrate after), AMS 2 Pro assignment (assign to left or right nozzle), and Vortek rack setup (individual hotend recognition). Load each slot’s hotend — two locating pins + magnetic retention — and the system reads all 5 in about 50 seconds flat.
Total time from unboxing to ready-to-print: roughly 1 hour. Not bad for a machine with this many subsystems.
Vortek Deep Dive: How It Actually Works
Vortek is the reason the H2C costs over $2,000. Here’s the physics:
Induction Hotend Exchange — Step by Step
- Toolhead parks at the Vortek rack, drops the current hotend into its slot
- Toolhead moves to the next slot, magnetic retention snaps the new hotend into place
- The toolhead’s magnetic induction coil wraps around the hotend’s steel sleeve
- High-frequency AC current generates eddy currents in the steel sleeve → the nozzle heats itself via induction
- Heating to PLA temperature: ~8 seconds
- Electronic board on each hotend talks to the toolhead contactlessly — sends temperature and filament data
The hotend itself is a precision piece of engineering: two locating holes for alignment, a permanent magnet for retention, a steel induction sleeve where heating happens, and an embedded electronics board for contactless communication. Each hotend is a self-contained unit — no heater cartridge, no thermistor wiring, no delicate cables to snag during exchanges.
Vortek vs. Everything Else
| Method | Switch Time | Purge Waste | Footprint | Chamber Insulation |
|---|---|---|---|---|
| Vortek (H2C) | ~42 sec | Zero (poop) | Compact | Excellent |
| AMS (single-nozzle purge) | ~1 min 22 sec | Massive | Compact | Excellent |
| Tool Changer (Prusa XL) | ~10 sec | None | Very large | Poor (open frame) |
| Dual Nozzle (H2D/X2D) | No switch | None | Compact | Excellent |
Vortek occupies a unique middle ground. It’s not as fast as a full tool changer (42s vs 10s), but it fits in a standard enclosed chassis where a tool changer needs a massive gantry. It eliminates the purge waste that makes single-nozzle AMS printing environmentally absurd, while keeping the same chamber insulation that makes high-temp engineering materials printable. And unlike a dual-nozzle setup, you’re not capped at two materials.
Capacity & Expandability
| Configuration | Max Colors | Waste |
|---|---|---|
| Vortek only (5 rack + 2 toolhead) | 7 colors | Zero poop |
| Vortek + 1× AMS 2 Pro | 7 + 4 = 11 colors | AMS colors produce purge |
| Vortek + 4× AMS 2 Pro (extreme) | Up to 25 colors | AMS colors produce purge |
The practical sweet spot: 7 Vortek colors (zero waste) + 1 AMS for a support material. Dedicate one Vortek slot to PVA or breakaway support, and you still have 6 colors for the model itself. For most multi-material projects, 7 zero-waste colors is genuinely more than enough — and you’re not throwing away 70% of your filament.
Build Volume Geometry — It’s Complicated
Because the H2C has two nozzles with different reach, the usable build volume depends on which nozzle you’re using:
| Mode | Build Volume |
|---|---|
| Left nozzle only (AMS feed) | 325×320×320mm |
| Right nozzle only (induction) | 305×320×325mm |
| Dual-nozzle printing | 300×320×325mm |
| Total two-nozzle envelope | 330×320×325mm |
For single-material single-nozzle prints, you get essentially the full 325mm. For dual-material, it drops to 300mm wide — still larger than the X2D (250mm) and most competitors.
Print Tests & Results (400 Hours)
Test 1: Multi-Color Benchy (Vortek 7-Color)
The litmus test: does Vortek actually work? Short answer: yes, flawlessly. A multi-color Benchy printed with zero poop — each color comes from its own dedicated hotend, swapped in/out by the Vortek mechanism. Color boundaries were crisp, no bleeding, no artifacts at the transition points. This is the promise of Vortek delivered: multi-color without the environmental guilt of a purge bin overflowing with wasted filament.
Test 2: BenchBin — The Ultimate Multi-Color Speed Test
The BenchBin model is a standardized multi-color torture test designed to compare multi-material systems head-to-head:
| Method | Print Time | Waste |
|---|---|---|
| AMS (single-nozzle purge) | ~44 hours | Massive |
| H2C (Vortek) | ~17 hours | Near-zero (prime tower only) |
| Tool Changer (Prusa XL) | ~11 hours | None |
The H2C slashes AMS print time by 61% while eliminating purge waste entirely. The tool changer is still 6 hours faster, but remember — the Prusa XL needs a separate enclosure (sold separately, bulky, and expensive) to print anything beyond PLA. The H2C does all of this in a sealed, actively heated chamber.
Test 3: Engineering Materials Gauntlet
| Material | Nozzle Temp | Chamber | Result |
|---|---|---|---|
| ABS | ~260°C | 65°C | ✅ Zero warping. Compare to P2S (no chamber heat) — severe corner lift |
| ASA | ~260°C | 65°C | ✅ Clean, no layer separation |
| PC (Polycarbonate) | ~290°C | 65°C | ✅ Strong layer adhesion, no delamination |
| PPA-GF | ~310°C | 65°C | ✅ Glass-fiber reinforced high-temp nylon — printed perfectly |
| PPS-GF20 + PolySupport for PA12 | ~330°C | 65°C | ✅ Jet engine model — support dissolved cleanly |
The 65°C active chamber + 350°C hardened nozzle is what makes this possible. The ABS comparison is especially instructive: on the P2S (passive chamber, ~40°C max), ABS corners lifted dramatically. On the H2C at 65°C, zero warping. If you print engineering materials regularly, the chamber heater alone might justify the price difference from an H2S.
Test 4: Multi-Material Drone Frame
This is where the H2C’s unique capability shines: three structurally different materials in one print:
| Material | Hotend Slot | Role |
|---|---|---|
| PA6-GF (black + orange) | Vortek slots 1-2 | Structural frame — high strength, glass-reinforced |
| TPU (green) | Vortek slot 3 | Landing gear and vibration dampeners — flexible, impact-absorbing |
| PVA (water-soluble) | Vortek slot 4 | Support interface — dissolves in water, leaves zero scarring |
This is a functional prototype that would normally require assembly from separately printed parts. The H2C prints it in one job: rigid nylon frame, soft TPU feet, and PVA supports that dissolve away. The finished part comes off the plate as a complete, useable assembly — this is additive manufacturing at its most powerful.
Test 5: Prime Tower Reality Check
Here’s an important nuance: Vortek eliminates poop, but not the prime tower. After every hotend swap, the nozzle needs a small prime to stabilize flow before resuming the print. The test: a colorful macaw model printed twice — once with prime tower enabled, once without:
| Mode | Surface Quality |
|---|---|
| No prime tower | Rough around eyes and beak — extrusion inconsistent after swap |
| With prime tower | Clean, consistent surfaces throughout |
Verdict: you need the prime tower. It’s frustrating — the whole point of Vortek is zero waste — but flow stabilization after a hotend swap is a real physical requirement, not a software shortcut.
Test 6: 7-Color Robot — Real Waste Numbers
The honest numbers everyone wants:
| Component | Weight |
|---|---|
| Model body | 64g |
| Prime tower waste | 115g |
| Total filament consumed | 179g |
Yes, the prime tower is nearly 2× the model weight. No, it’s still dramatically better than AMS purging, where a 125g model easily generates 400g+ of waste (3×+ model weight). And here’s the optimization trick: the prime tower size is fixed per job, not per model. Print 10 of the same robot on one plate, and you still only burn 115g on the prime tower — amortizing it to 11.5g per unit. AMS purging scales similarly, so the Vortek advantage holds at any quantity.
Five Reasons the H2C Wins (After 400 Hours)
1. Zero-Poop Multi-Color Is Real
This isn’t marketing. Each color has its own dedicated hotend. When the print needs a new color, Vortek physically swaps the entire nozzle assembly — no purging, no mixing, no contamination. The environmental and cost savings over a 1,000-hour lifetime are genuinely enormous. A single 40-hour multi-color print on AMS can generate 1kg+ of waste. The same print on H2C: a ~150g prime tower.
2. Seven Colors Without Compromise
Five hotends in the Vortek rack + one on each side of the toolhead = 7 simultaneous colors, all with zero purge. Even if you reserve one slot for PVA support material, you still have 6 colors for the model. Most full tool-changer systems cap at 4-5 tools and require a massive gantry.
3. The “Third Way” Design Architecture
Vortek occupies a unique space that didn’t exist before: faster than AMS (42s vs 82s per switch), more compact than a tool changer (same chassis as H2D/H2S, fits on a desk), and better insulated than any open-frame tool changer for high-temp materials. It’s a genuine innovation, not just a spec bump.
4. Heated Chamber + Engineering Materials
65°C active chamber. 350°C hardened steel induction nozzles. A PMSM servo extruder pushing 10kg of extrusion force (70% more than stepper extruders). Three-stage filtration (G3 pre-filter + H12 HEPA + activated carbon). Flame-retardant chamber materials. This isn’t just a PLA/PETG printer that happens to have multi-color — it’s a legitimate engineering workstation that prints PPA-GF, PPS, PC, and multi-material assemblies in one job.
5. Compact, Fully Integrated Moisture Control
The AMS 2 Pro is sealed with desiccant — no open spool holders, no separate dry boxes. The entire printer footprint is 492×514×626mm (under 60cm on both dimensions), including the AMS on top. Total height with AMS: ~86cm. For a machine capable of 7-color zero-poop + 350°C materials, that’s shockingly compact. A Prusa XL with enclosure eats an entire workbench.
Three Things to Know Before Buying
Caveat 1: Switch Time Adds Up on Color-Heavy Prints
Each Vortek swap takes ~42 seconds: cut filament → return current hotend to rack → pick up new hotend → induction heat (~8s) → prime on tower. Plus a ~30 minute pre-print calibration cycle (nozzle offsets, motor tuning, bed mesh) at the start of every job. On a model with hundreds of color changes, the time difference vs. a 10-second tool changer becomes meaningful — we’re talking hours of accumulated switching overhead.
Caveat 2: Soft TPU Is a Problem
Standard flexible TPU (64D and softer) will buckle and jam inside the feed path, especially through the AMS 2 Pro’s Bowden tubes. The workaround: use AMS-compatible slightly-harder TPU variants, or bypass the AMS entirely — load TPU directly from the external spool holder and print single-color. For a PLA+TPU dual-material print, mount the TPU spool above the printer to minimize feed resistance.
Caveat 3: The Prime Tower Is Still Real Waste
Vortek eliminates purge poop, not the prime tower. In the 7-color robot test: 64g model, 115g prime tower — nearly double the model weight. It’s far better than AMS purging (where waste routinely hits 3-5× model weight), but it’s not magic. The mitigation strategy is the same as with AMS: batch multiple copies per plate to amortize the fixed prime-tower cost across more parts.
H2C vs. The Competition — At a Glance
| Feature | H2C Combo | H2D Combo | Prusa XL (5-tool) |
|---|---|---|---|
| Price (USD) | $2,199 | $1,749 | $3,499+ (no enclosure) |
| Multi-material method | Vortek induction swap | Dual nozzle | Full tool changer |
| Max colors (zero poop) | 7 | 2 | 5 |
| Switch time | ~42 sec | No switch (always ready) | ~10 sec |
| Active chamber heat | 65°C ✅ | 65°C ✅ | ❌ (open frame) |
| Nozzle max temp | 350°C | 350°C | 300°C |
| Extruder type | PMSM servo (10kg force) | Stepper | Stepper (Nextruder) |
| Sensors / AI cameras | 59 sensors + quad-camera | Dual camera + sensors | Load cell + basic camera |
| Filtration | 3-stage (HEPA + carbon) | Carbon filter | None (open frame) |
| Footprint | 492×514×626mm | 492×514×626mm | ~900×900mm+ (with enclosure) |
Price Breakdown
| Configuration | Price (USD) |
|---|---|
| H2C Combo (printer + AMS 2 Pro) | $2,199 (was $2,399) |
| H2C Vortek Utility Bundle (+extra AMS 2 Pro + Filament Track Switch) | $2,449 |
| H2C Laser Full Combo (10W laser + cutter module) | $2,649+ |
| Additional induction hotend (0.4mm) | ~$35 each |
At $2,199, the H2C is $450 more than the H2D Combo ($1,749) and $800 more than the H2S Combo ($1,399). The premium is entirely for Vortek — if you don’t need 3-7 color zero-poop printing, those cheaper H2 siblings are objectively better value. But if multi-material is central to your workflow, the H2C’s waste savings alone can recoup the price difference in filament costs over a year of heavy use.
Who Should Buy the H2C?
| Buy the H2C if… | Skip it if… |
|---|---|
| You do frequent 3-7 color prints and the waste from AMS purging is costing you real money | You print ≤2 colors and the H2D’s dual-nozzle at $1,749 handles your needs |
| You need multi-material in one print — rigid + flexible + soluble support | You only print PLA and PETG — the X2D ($899) or P2S ($749) do that beautifully |
| You print engineering materials (ABS/ASA/PC/PPA/PPS) regularly | Your budget is under $1,500 — the H2S at $1,399 is the smarter play |
| You’re a small-batch manufacturer who amortizes prime-tower waste across full-plate production runs | Color-switch speed is your top priority — a tool changer is faster (but much larger and pricier) |
| You want the most advanced sensor/AI ecosystem in consumer 3D printing | You’re a beginner — the H2C’s complexity and cost are overkill for learning |
Final Verdict
Bambu Lab H2C Combo: 4.5 / 5
The H2C is the most technically ambitious consumer 3D printer ever made. Vortek isn’t a gimmick — it’s a genuine innovation that solves the single biggest problem in multi-material FDM printing (purge waste) while keeping the compact, enclosed form factor that makes high-temperature materials printable.
Is it perfect? No. The prime tower still wastes material (though far less than AMS purging). The 42-second switch time means color-heavy models take hours longer than on a tool changer. And at $2,199, it’s a serious investment — you need a workflow that genuinely benefits from 7-color zero-poop printing to justify the premium over the H2D or H2S.
But for the right user — a small-batch manufacturer, a multi-material prototyper, or a serious hobbyist who’s tired of throwing away kilograms of purge waste — the H2C delivers something no other printer on the market can match: seven materials, zero purge, in a desktop footprint, with 350°C engineering-material capability.
Bambu Lab took a swing at solving multi-material waste, and they connected. The H2C is what multi-material 3D printing should have been all along.
Recommended for: Multi-material prototypers, small-batch manufacturers, engineering workshops, and serious enthusiasts who need 3+ colors without the guilt of a landfill-bound purge bin.
FAQs
What is Vortek and how is it different from AMS?
AMS feeds multiple filaments through one nozzle, purging the old color each time (massive waste). Vortek physically swaps entire hotends — each color or material gets its own dedicated nozzle. When the print needs a new color, the toolhead exchanges hotends from a 5-slot rack. Result: zero purge waste, 42-second swaps.
Does the H2C really produce zero waste?
Zero purge waste, yes. But the prime tower still consumes material to stabilize flow after each hotend swap. In testing, a 7-color 64g robot model required a 115g prime tower — about 1.8× the model weight. For context, the same model on AMS would produce 400g+ of purge plus a prime tower. The prime tower size is fixed per job, so batch-printing multiple copies per plate dramatically improves per-unit efficiency.
Can the H2C print flexible filaments?
Standard soft TPU is problematic through the AMS 2 Pro feed path (tubes are too restrictive — filament buckles and jams). Two workarounds: (1) use slightly-harder AMS-compatible TPU variants, or (2) bypass AMS entirely and load TPU directly from the external spool holder. For TPU+PLA dual-material prints, mount the TPU spool above the printer to reduce feed resistance.
How does the H2C compare to the Prusa XL?
The Prusa XL (5-tool) switches tools faster (~10s vs 42s) and produces zero waste (no prime tower needed). But it’s an open-frame design — no heated chamber, no filtration, no enclosure. Adding a Prusa enclosure makes it massive and expensive. The H2C fits in a standard desktop footprint with a 65°C active chamber and 3-stage filtration. For engineering materials, the H2C wins. For pure speed on PLA multi-color, the XL edges ahead.
Should I buy the H2C or the H2D?
If you need 3-7 materials in one print with zero purge waste → H2C ($2,199). If you need 2 materials plus optional laser engraving/cutting → H2D ($1,749). The H2D has a larger build volume (350×320×325mm) but is capped at 2 materials. The H2C costs $450 more but gives you 5 additional materials.
What induction hotends are included?
The H2C Combo includes 5 induction hotends (0.4mm hardened steel) pre-loaded in the Vortek rack, plus 2 in the toolhead (one standard for AMS, one induction). Additional hotends are ~$35 each. All support 0.2, 0.4, 0.6, and 0.8mm nozzle diameters — but all hotends in a single print must use the same diameter.
How long does the initial setup take?
About 1 hour from unboxing to ready-to-print: ~15 minutes physical assembly (glass lid, AMS, cables), ~30 minutes automated calibration (nozzle offsets, motor tuning, vibration compensation, bed leveling), ~7.5 minutes Vortek rack setup (camera calibration + hotend load test), plus firmware update if available.
References: 400-hour hands-on testing data adapted from the Age of 3DP review at unolaboratory.com/bambu-lab-h2c-review/. Specifications and pricing from us.store.bambulab.com as of August 2026. Machine provided for review by SunStella (Bambu Lab Japan distributor).