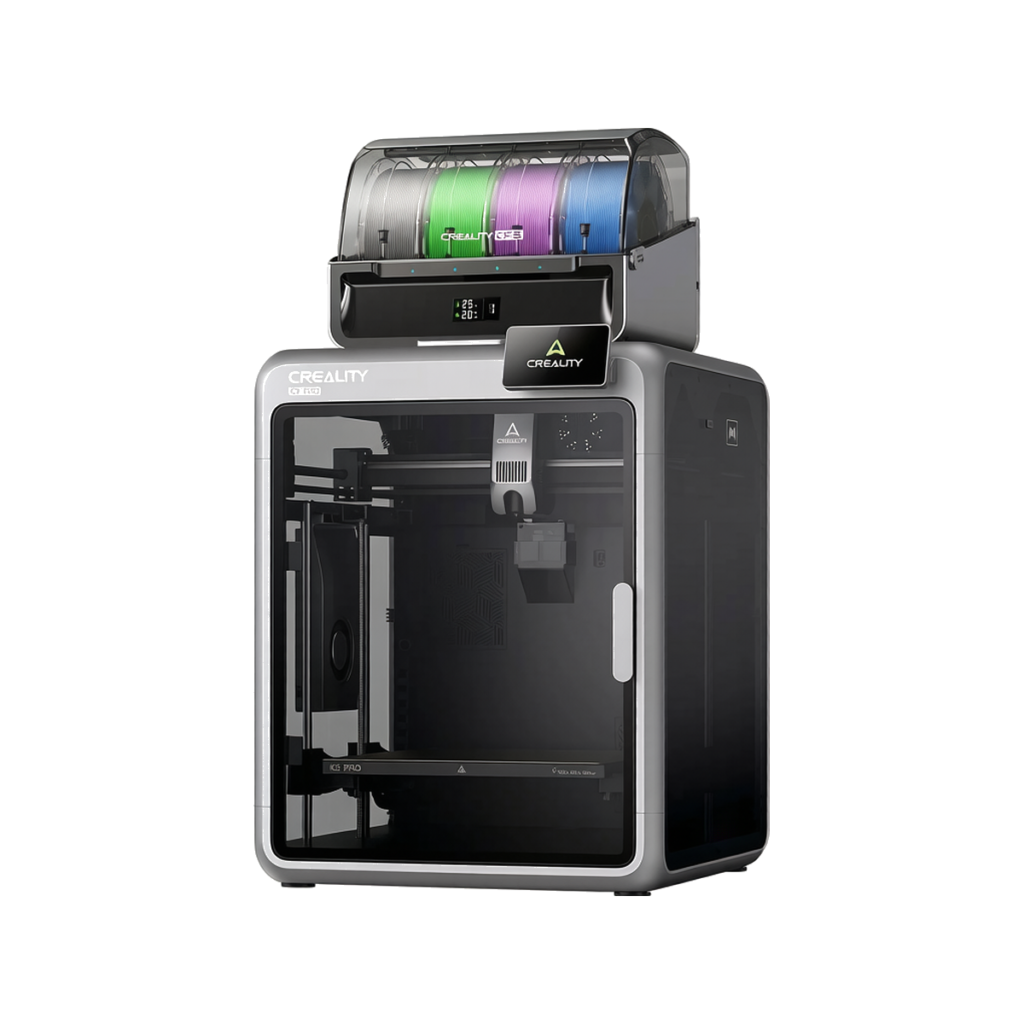
First Glance: Where the K2 Pro Fits
Creality’s K2 series now spans three models: the flagship K2 Plus (350mm³), the mid-range K2 Pro (300mm³), and the entry-level K2 (260mm³). The K2 Pro Combo is the one that makes the most sense for most people — it keeps nearly every premium feature from the K2 Plus (active chamber heating, dual AI cameras, RFID filament recognition) but drops the price tag significantly and shrinks the footprint to something that actually fits on a desk.
| Model | Build Volume | Active Chamber | AI Cameras | Combo Price (USD) |
|---|---|---|---|---|
| K2 Plus Combo | 350×350×350mm | ✅ 60°C | Dual | $1,199 |
| K2 Pro Combo | 300×300×300mm | ✅ 60°C | Dual | $799 |
| K2 Combo | 260×260×260mm | ❌ | Single | $549 |
The K2 Pro Combo bundles the printer with one CFS (Creality Filament System) unit — a 4-slot sealed multi-material box. You can chain up to 4 CFS units for 16-color printing.
Unboxing: What’s Actually in the Box
The box is heavy. Creality slaps a “2-person lift” warning on it for good reason — the printer alone weighs 23.7 kg (52 lbs). Opening it up reveals solid foam packing and a well-organized layout:
Included in the Box
| Item | Notes |
|---|---|
| K2 Pro printer body | Fully pre-assembled CoreXY frame |
| CFS multi-color unit | 4-slot sealed dry box with RFID reader |
| Glass top lid | Tempered, sits on top rails |
| 4″ color touchscreen | Detachable, connects via cable |
| Filament buffer | Manages tension between CFS and extruder |
| Spool holder | For external single-color printing |
| PTFE tubing + cables | Pre-cut lengths for CFS connection |
| 500g sample filament | Hyper PLA, enough for first tests |
| Tool kit + spare parts | Nozzle wrench, screws, spare nozzle, grease |
| Power cable | Standard IEC C13 |
One thing that stands out immediately: this thing is almost fully assembled. No frame bolting, no belt tensioning, no wiring harnesses to fish through extrusions. Coming from the Ender-3 era where “assembly” meant a Saturday afternoon with Allen keys, this is a different world entirely.
Inside the chamber, you can already spot the dual AI cameras — one mounted right behind the nozzle for calibration, and one in the front-right corner for print monitoring. The left side panel houses an auxiliary cooling fan. Build quality on the sheet metal enclosure feels solid, and the die-cast aluminum frame gives it a rigidity that budget printers can’t match.
Setup: 20 Minutes from Box to Print
The setup process is refreshingly simple:
- Place the glass top lid on the printer’s upper rails
- Set the CFS unit on top of the glass lid
- Connect the filament buffer, PTFE tube, and data cable to the rear ports
- Plug in power, attach the touchscreen
- Run the automated initialization wizard
The initialization takes about 20 minutes and covers: language + network setup, timezone, nozzle heating test, fan verification, vibration mode optimization (input shaping), full-auto bed leveling, and CFS operation check. No manual knob-turning, no paper-under-the-nozzle nonsense — just tap “Start” and wait.
Key Features Breakdown
1. CFS Multi-Color System
The CFS (Creality Filament System) is a sealed 4-slot dry box with built-in RFID recognition. Tap a spool against the reader on the side of the printer and it auto-detects the filament type and color — no manual entry needed. Each CFS holds four 1kg spools, and you can daisy-chain up to 4 CFS units for 16-color printing. The enclosure is sealed with desiccant packs, so your filament stays dry mid-print instead of soaking up ambient humidity.
Color switching works like every single-nozzle multi-material system: the printer purges the old filament at a waste chute, then loads the new color. Yes, this creates waste — more on that later. But the mechanism itself is reliable; during testing, I saw zero failed color changes across multiple multi-color prints.
2. Dual AI Cameras
Two cameras, two jobs:
| Camera | Location | Function |
|---|---|---|
| Nozzle AI camera | Behind the nozzle | Auto-calibrates Pressure Advance and Flow Rate; detects foreign objects on the nozzle |
| Chamber AI camera | Front-right corner | Print monitoring; spaghetti detection; sends alerts if a print fails |
The nozzle camera is the standout. It runs an automated calibration routine that measures extrusion consistency and adjusts Pressure Advance and Flow Rate on the fly. Before calibration, a clearance test model jammed at 0.06mm gaps. After calibration, 0.04mm gaps slid through smoothly — a meaningful improvement in dimensional accuracy that costs you about 10 minutes of calibration time.
3. Active Chamber Heating (60°C)
This is what separates the K2 Pro from the base K2. A dedicated chamber heater brings the enclosure up to 60°C (140°F), which is essential for printing ABS, ASA, nylon, and engineering-grade filaments like PPA-CF without warping. During ASA test prints, parts came out dead flat — no corner lift, no layer splitting. The K2 Plus gets the same 60°C chamber; the base K2 gets nothing.
One quirk: the chamber heater only kicks in after the print starts, not during preheating. In a 28°C room, reaching 50°C took about 7 minutes. In a cold garage in winter, expect longer. Creality’s logic is that the heated bed handles initial warm-up — which is mostly true for PLA, but less ideal for materials that want a fully heat-soaked chamber from layer one.
4. RFID Filament Recognition
Tap a Creality RFID-tagged spool against the reader on the right side of the printer and it instantly registers the filament type, color, and remaining quantity estimate. It’s a small quality-of-life feature, but once you get used to it, manually entering filament settings in a slicer feels like punching in channel numbers on a 90s TV.
Print Tests & Results
Test 1: 4-Color 3DBenchy
Colors: red hull, white cabin, green chimney, yellow details. Print time: approximately 35 minutes. Result: clean and crisp. Color transitions were sharp with no bleeding between sections. No stringing, no layer shifts, no artifacts at the purge tower. For a multi-color Benchy, this is about as clean as it gets.
Test 2: FDM Torture Test
Print time: approximately 1 hour 40 minutes. The results tell the story:
| Test | Result |
|---|---|
| Clearance pins | 4 of 5 pins free; tightest gap pin stuck (expected at this tolerance) |
| Bridging | No sagging — bridges printed clean across |
| Overhangs | Clean down to 30°; only the steepest 15° overhang showed minor droop |
| Cooling | Auxiliary side fan + part cooling fan combo works well |
Test 3: Full-Bed 300mm First Layer
This test uses every millimeter of the 300×300mm build plate. The result: the entire 300mm area is genuinely usable. The bottom-right corner showed a tiny gap in extrusion, but nowhere near enough to cause adhesion issues. Far too many printers advertise a “300mm” build volume but can’t actually print edge-to-edge — the K2 Pro delivers the full square.
Test 4: 4-Color Articulated Dragon
This is the torture test for multi-color: a multi-part articulated dragon with 4 colors, running approximately 40 hours. The print completed without intervention. Joints articulated freely straight off the plate. Color registration was consistent across all 40 hours. The waste was significant — about 400g of purge material for a 125g model — but that’s the physics of single-nozzle multi-material, not a K2 Pro-specific problem.
Test 5: Multi-Material Support Interface
One of the smartest use cases for multi-material: printing the model body in regular PLA but using a dedicated support interface material (CoPE filament) for the support contact layers. The result? Supports lifted off by hand, leaving a smooth finish underneath with zero scarring. This alone justifies the CFS for functional-part printers.
Test 6: TPU (Single-Color, Bypassing CFS)
Here’s the catch: flexible filaments and the CFS do not mix. Testing TPU 64D through the CFS caused the filament to buckle and jam inside the feed path. The workaround is simple: disconnect the CFS, load TPU directly into the direct-drive extruder from the external spool holder, and print single-color. Results were decent — slight stringing that’s typical for TPU — and entirely fixable with retraction tuning.
CFS Waste: The Honest Numbers
Let’s talk about the elephant in the room. Single-nozzle multi-color printing means purging — and purging means waste. In testing:
- A 125g articulated dragon generated ~400g of purge waste — over 3× the model weight
- A 3-color decorative plate (~80g) produced about ~200g of waste
- A single-color print through CFS: zero waste (obviously)
This isn’t a K2 Pro problem — it’s inherent to every single-nozzle multi-material system on the market (AMS, CFS, MMU, you name it). The strategy to minimize waste: batch multiple copies in the same print job. Printing 4 dragons at once still generates ~400g of waste but yields 4× the output. Or use multi-color only for accent layers (text, logos, a few colored top layers) rather than full-model color changes every layer.
AI Calibration: Does It Actually Work?
Short answer: yes. The nozzle AI camera runs a calibration routine that measures extrusion width and adjusts Pressure Advance + Flow Rate automatically. Testing before and after calibration on a clearance gauge model:
| State | Smallest Free Gap |
|---|---|
| Before calibration | 0.06mm (jammed) |
| After calibration | 0.04mm (smooth) |
A 0.02mm improvement doesn’t sound like much, but that’s the difference between parts that press-fit and parts that need sanding. The calibration takes about 10 minutes — run it once per filament type and the improvement carries through all subsequent prints of that material.
Software Experience & Known Bugs
The K2 Pro uses Creality Print 6.0 (or newer). It’s Creality’s in-house slicer, and it’s… fine. Not PrusaSlicer-level polished, but entirely usable for day-to-day work. WiFi file transfer works reliably, and the touchscreen interface is responsive.
Two bugs worth noting from the test period:
- By-Object printing glitch: In sequential (by-object) mode, the extruder collided with a previously printed part during a color change on the left-front object. A subsequent object on the left-rear vanished mid-slice. Stick to by-layer mode for multi-color until a firmware fix lands.
- Temperature hang after material switch: After printing PPA-CF at 300°C, switching to a PETG profile caused the nozzle to spike to 300°C and hang for 30+ minutes without starting. Required a full printer reset to clear. Likely a firmware state bug from the high-temp session.
Neither is a dealbreaker — both are firmware-level issues that Creality will likely patch — but they’re worth knowing before you buy.
Pros & Cons
Pros
- 300mm³ full-area build — genuine edge-to-edge usability
- 60°C active chamber heating — prints ABS/ASA/PPA-CF flat
- Dual AI cameras with real calibration benefits
- CFS multi-color: reliable switching, RFID auto-detect
- Near-zero assembly — about 20 minutes to first print
- 16-color capability with 4× CFS daisy chain
- Multi-material support interfaces — game-changer for functional parts
- $799 Combo price is aggressive for the feature set
Cons
- Multi-color waste is brutal (~3× model weight)
- TPU incompatible with CFS — must bypass for flexibles
- Chamber heater starts after print begins, not during preheat
- Firmware bugs in by-object mode and temp handling post-PPA
- 23.7 kg — you’re not moving this around casually
- Creality Print slicer is adequate but not exceptional
- CFS sealed with desiccant only — no active filament drying
Price Breakdown & Value
| Product | Price (USD) | Notes |
|---|---|---|
| K2 Pro Combo | $799 | Printer + 1× CFS (4-color), official store |
| K2 Combo | $549 | No chamber heating, single camera, no RFID |
| K2 Plus Combo | $1,199 | 350mm³, 350°C nozzle, 30k accel |
| CFS (standalone) | $319 | Expands to 8/12/16 colors |
At $799 for the Combo, the K2 Pro sits at the price of a mid-range Bambu Lab P1S Combo but delivers features closer to an X1C: active chamber heating, dual AI cameras, a 300mm³ build plate, and RFID filament recognition. The value proposition is hard to argue with. For reference, a comparably featured dual-nozzle printer (Bambu Lab X2D Combo) runs $899 — but the X2D has a smaller build volume and a different dual-nozzle approach.
If you already own a CFS or plan to print single-color only, the standalone K2 Pro (without CFS) should land around the $600–$650 range, though official US standalone pricing isn’t listed at time of writing.
Who Should Buy the K2 Pro Combo?
| Buy if… | Skip if… |
|---|---|
| You want active chamber heating for ABS/ASA/nylon without paying K2 Plus money | You only print PLA and PETG — the base K2 Combo at $549 does that fine |
| 300mm³ is your sweet spot — big enough for cosplay helmets, small enough for a desk | You need a 350mm³+ build — go K2 Plus Combo |
| Multi-color matters and you can batch prints to amortize purge waste | Multi-color waste at 3× model weight is unacceptable — stick to single-color |
| You print functional parts that benefit from support interface materials | You print exclusively flexible TPU — the CFS won’t help you |
| AI calibration and spaghetti detection are features you’ll actually use | You prefer manual tuning and don’t trust automated calibration |
Final Verdict
Creality K2 Pro Combo: 4.2 / 5
The K2 Pro Combo is the Goldilocks machine in Creality’s 2025-2026 lineup. It’s not the biggest, not the cheapest, but it’s the one that balances premium features against a reasonable price better than either of its siblings.
You get the K2 Plus’s active chamber heating, dual AI cameras, RFID, and 16-color CFS expandability — all in a 300mm³ package at $799. That’s $400 less than the K2 Plus Combo for a machine that does 90% of what most people actually need.
The multi-color waste is what it is — physics doesn’t negotiate. But the CFS earns its keep as a dry-box filament manager and support-interface enabler even when you’re not printing rainbows. The firmware bugs are annoying but fixable; Creality’s update cadence on the K2 platform has been steady.
If you’re upgrading from an Ender-3 or moving from a single-color CoreXY into multi-material territory, the K2 Pro Combo is the smartest $799 you can spend in 3D printing right now.
Recommended for: Hobbyists moving to multi-material, cosplay makers who need 300mm + enclosure heat, functional-part printers who’ll use support interfaces.
Specifications at a Glance
FAQ
Does the K2 Pro need assembly?
Almost none. The printer comes pre-assembled — you only attach the glass lid, CFS unit, screen, and a few cables. First print in ~20 minutes.
Can the K2 Pro print TPU?
Yes, but only in single-color mode bypassing the CFS. Load TPU directly into the direct-drive extruder from the external spool holder. The CFS feed path is too restrictive for flexible filaments.
How much waste does multi-color printing generate?
Roughly 2–4× the model weight, depending on how many color changes per layer. Batching multiple copies of the same model in one print job is the most effective way to amortize purge waste.
Is the chamber heater loud?
The chamber heater itself is near-silent. The auxiliary cooling fan and part-cooling fan are the main noise sources — typical for an enclosed CoreXY. Not silent, but not disruptive in the next room.
How does the K2 Pro compare to the Bambu Lab P1S?
The K2 Pro Combo at $799 competes directly with the P1S Combo at $799. Key differences: K2 Pro has active chamber heating (P1S does not), dual AI cameras (P1S has one low-fps cam), and a 300mm³ plate (P1S is 256mm³). The P1S has a more mature slicer ecosystem and a larger community. Both are excellent — your call comes down to build volume and chamber heating needs.
Can I use non-Creality filament with the CFS?
Yes. The RFID reader is optional — you can manually set filament type and color in the slicer or on the touchscreen for any brand. Just make sure spool dimensions fit: 197–202mm diameter, 42–68mm thickness.
References: Hands-on testing data and observations adapted from the Age of 3DP review at unolaboratory.com/creality-k2-pro-combo/. Pricing from store.creality.com and creality3dofficial.com as of August 2026.